Launch Fast With Elements!
Elements are Fortress designed widgets for building out your application's front end without the hassle of extensive UI work. Core functionalities of our API are delivered through Elements, allowing you to launch your application at unprecedented speeds!

Test it out!
Visit https://elements.sandbox.fortressapi.com/playground to test out all of our elements widgets!
Each Elements has a code template that you can start with. Different parameters added to the script will let you generate the appropriate widget. Below we'll go over the code template, authorization, configuration, and event messaging. Following this page will be separate pages for each of the Elements we currently offer. Eventually you'll be able to wigitize our entire product stack and launch in weeks, not months.
Elements JS Library and Instance
Add a script tag with the corresponding URL for the Fortress file storage https://elements.fortressapi.com/libs. If there is a need to use some Environment specific build add the corresponding subdomain name e.g. elements.sandbox.fortressapi.com, or for production, elements.fortressapi.com.
Do NOT put any async or defer attributes in tag. It may lead to unexpected issues with element.
<html>
  <head>
    <script src="https://elements.sandbox.fortressapi.com/libs/fortress-elements-js.min.js"></script>
  </head>
</html>
Initialize The Elements Widget
After downloading the library, FortressElementsJS will be accessible in the window global scope. It contains the methods responsible for creating the ElementClient and manipulating/interacting with Fortress Public API. createElementClient is returning the client instance.
const EJS = window.FortressElementsJS;

  // `elementClient` keeps the reference to client
  const elementClient = EJS.createElementClient({
    elementName: EJS.ElementNames.{Element Name To Initialize},
    onMessage: (message: ElementMessage) => {},
    theme: { primaryColor: '#D70E0E', secondaryColor: '#CCC' },
    uiLabels: {
      statusScreenButton: "abc.."
    }
  });
Elements Configuration
Several parameters can be configured for the Elements Widget. As more products are rolled out, the list of elementName will grow to include the new functionality.
Options:
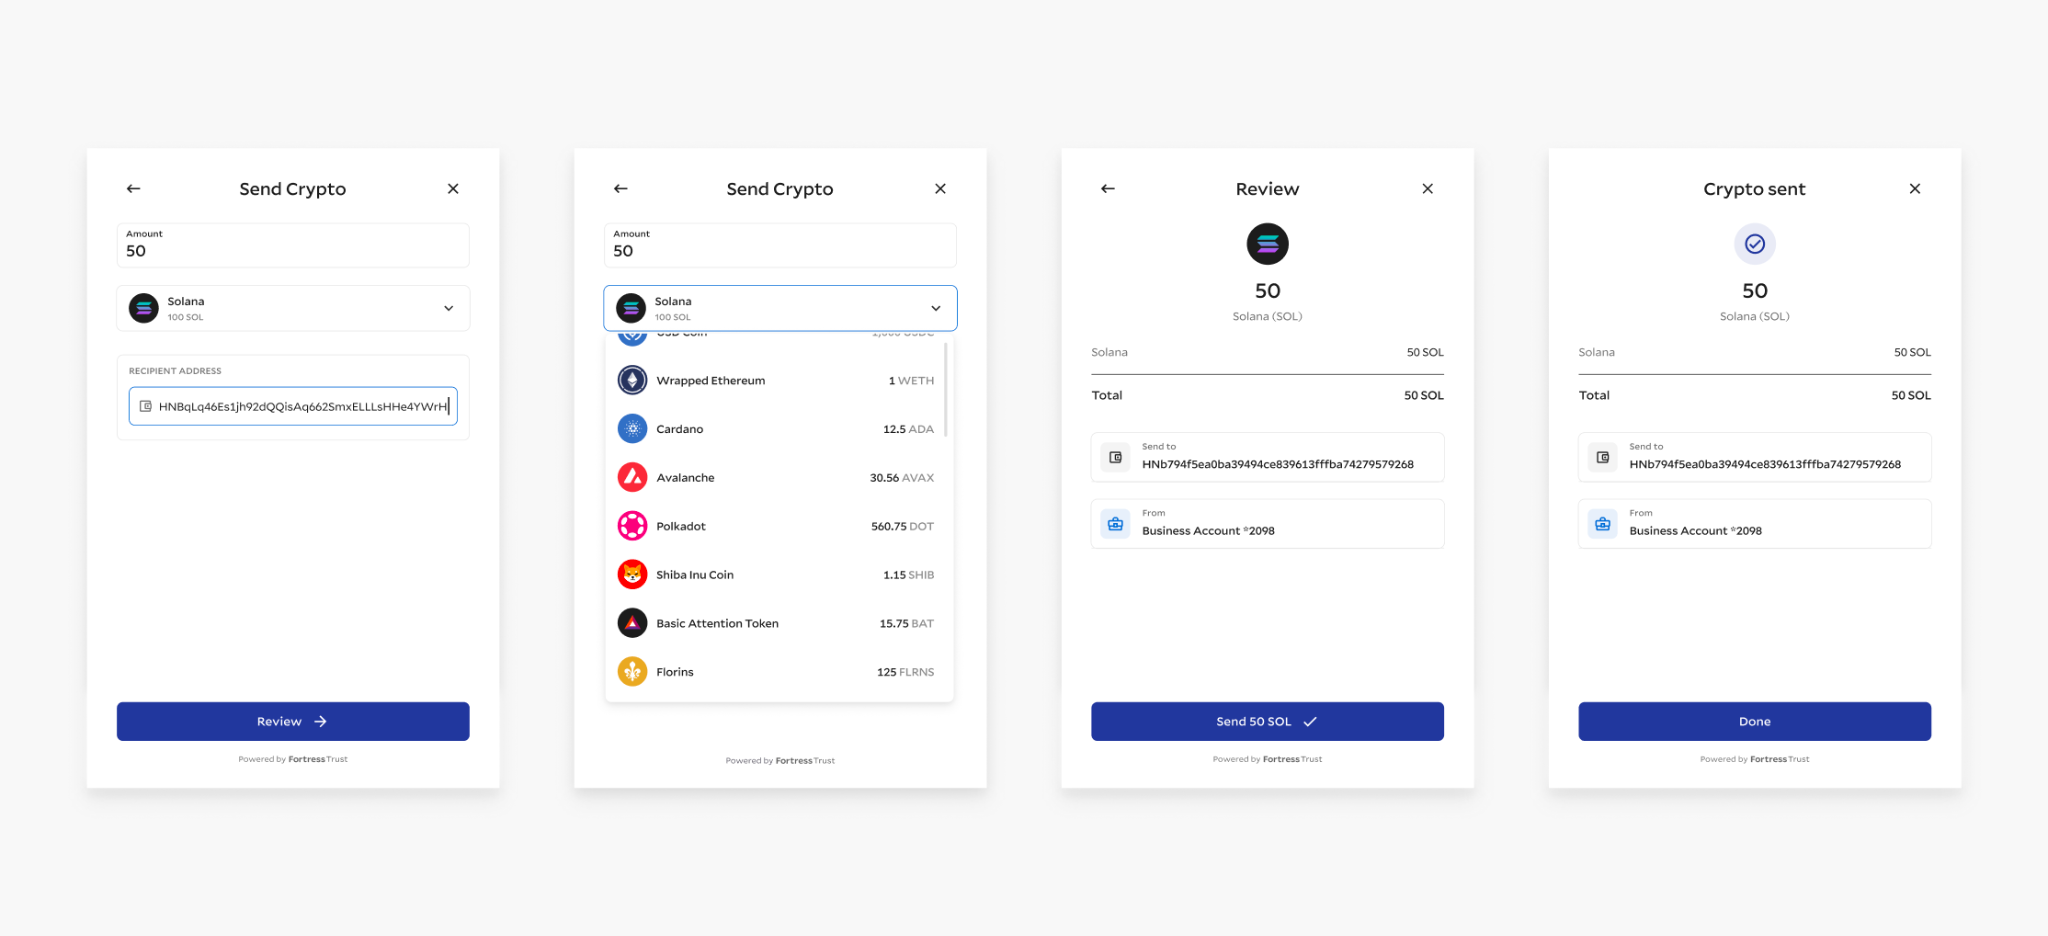
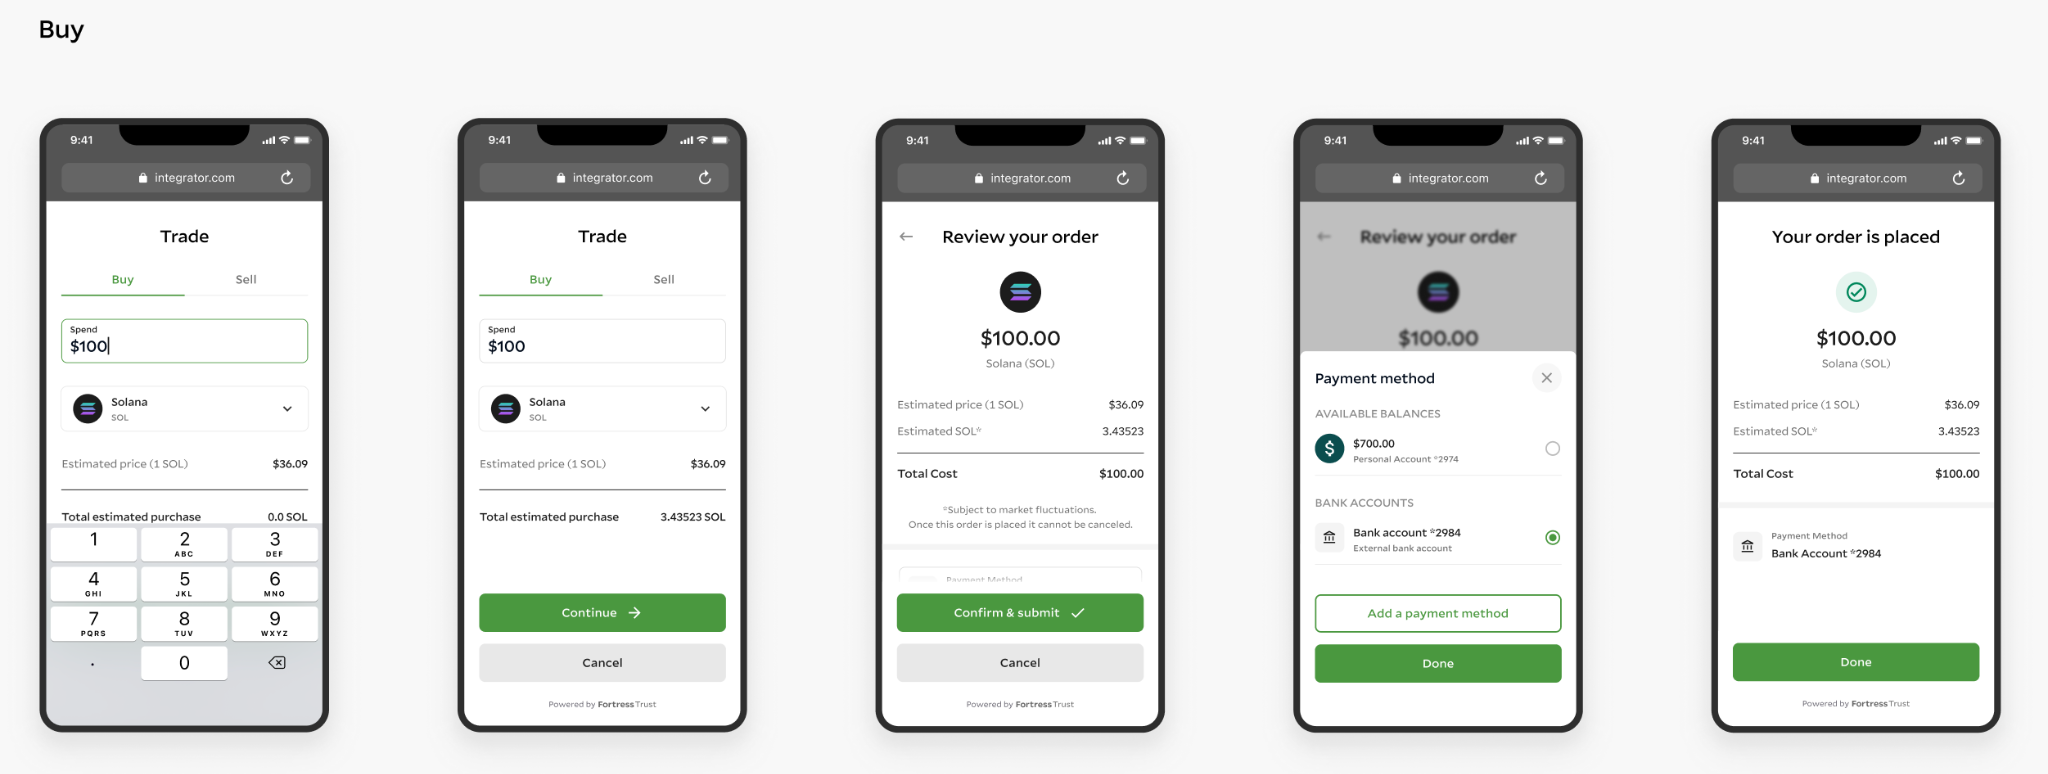
elementName ( required ) - supported names: KYC, CARD, TRADE, BANK-ACCOUNT, TRANSFER (Trust APIs)
- COIN-BALANCE, COIN-RECEIVE (Wallet APIs)
onMessage ( optional ) - callback to consume messages based on user flow result
theme ( optional ) - customization options for UI, primaryColor supported for buttons
uiLabels (optional) - property statusScreenButton button label on status screen
Elements Authorization
Each instance of the elements widget will need a generated JWT token in order to run. The JWT expire time is 1 hour from generation. In order to generate the JWT, you'll have had to already created an L0 Identity.
Note: If the JWT expires during the workflow, the form will error out on submission and a new instance will need to be spun up for the end user to run through again.
GET /api/trust/v1/identity-elements/{identityId}/jwt?element="{element name}"
// element name values = "kyc", "trade", "transfer", "cardLinking", "addBankAccount"

//Sample Response

{
  "jwt": "ey..."
}
Running Or Closing The Widget
Two functions are included with Elements for initialization or destruction, use the below code sample for guidance:
const elementClient = EJS.createElementClient({ elementName: EJS.ElementNames.{Element Name} })

const identityId = '9a443475-5159-4f51-bf21-002e6609091e';
const { data: { jwt } } = await generateElementSessionJWT(identityId);

// Open Elements UI
elementClient.run(jwt);

// Removing DOM anchor element and instance of the client.
// Trigger method when the element is done with its flow.
// Use case with React.js when component umounts
elementClient.destroy()
Utilizing The Messages Events In The Widget
You may have noticed the onMessage parameter during the widget configuration. This parameter will return you events from the widget workflow, and are great to use in your programmatic functionality.
ELEMENT_STARTED | Client initialized and Element UI is exposed to user |
ELEMENT_EXITED | UI is closed. Published after actions: cancel button, cross icon, status screen button are pressed |
ELEMENT_UPDATED | Client receives result from Elements API. This will be different depending on the Element being used. |
ELEMENT_FLOW_DECLINED | UI is closed by clicking on: cancel button , cross icon, button on status screen are pressed |
The following sections will cover each widget and their specific parameters.
Identity Requirement
Each ELEMENTS widget requires that you have either an L0 or L1
identityalready created.
Updated 5 months ago